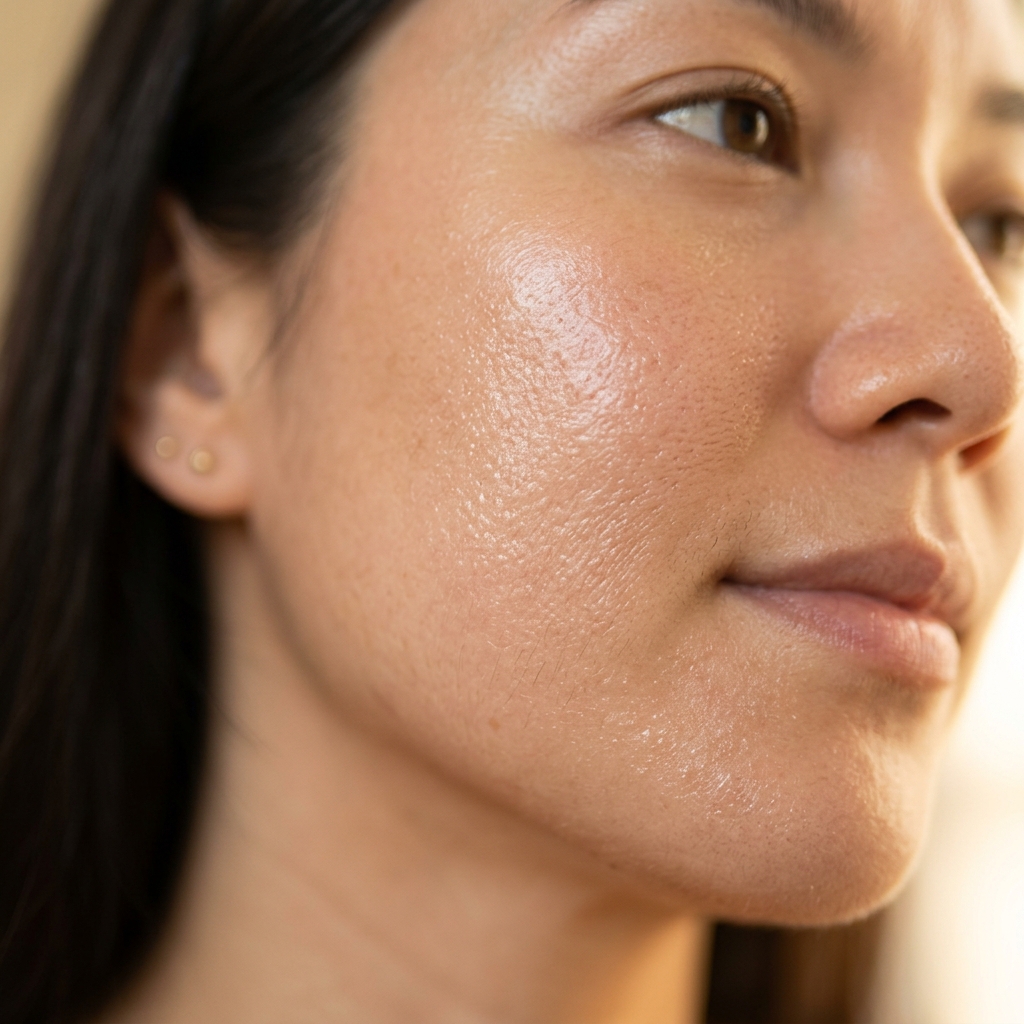
📘 Companion Guide to the Master Uneven Face Skin Pillar
This clinical guide bridges dermatological skincare with cosmetic reality, expanding upon our central pillar: Uneven Face Skin: How to Fix Rough Texture, Bumpy Pores & Patchy Tone in India. While our sibling guides focus on Orange-Peel Pores, the Texture-to-Pigment Cycle, and Sandpaper Skin Texture, this page explains why foundation acts like a magnifying glass on surface irregularities—and provides the clinical protocol to achieve seamless, non-separating cosmetic wear.
The Cakey Makeup Paradox: Why Coverage Highlights Texture
Almost everyone dealing with textured skin in India makes the same intuitive mistake: When they notice rough sandpaper patches, closed comedones, or enlarged pores, they reach for higher-coverage, ultra-matte foundations or thicker concealers to "hide the bumps."
Yet, within an hour of application, the exact opposite happens. Instead of disguising the texture, the makeup acts like an optical magnifying glass:
Periporoid Micro-Shadowing
Liquid foundation contains solid iron oxide and titanium dioxide pigment particles suspended in a carrier. Over enlarged pores, pigment naturally settles into the follicular depression while clinging thinly to the raised rims, creating sharp 3D contrast shadows that make pores look twice as deep.
Corneocyte Scale Lamination
On dehydrated skin, dead keratinocytes do not lie flat; their microscopic edges curl upward like shingles on an old roof. Foundation pigment adheres to these raised edges, making hundreds of microscopic dry flakes instantly visible as chalky white/grey specks.
Sebum-Carrier Separation
Full-coverage matte formulas contain high levels of volatile silicones that evaporate to "set" the makeup. But when sebaceous glands pump out sebum underneath, the sebum dissolves the set pigment film, causing it to break apart into distinct, greasy, cakey islands.
💡 The Fundamental Dermatological Law
Makeup can cover color (hyperpigmentation, redness, PIH); it can NEVER cover 3D texture (bumps, craters, flaking). The smoother your biological stratum corneum, the less makeup you need—and the more natural your base will look.
The 4 Biological Culprits Behind Makeup Breakdown
When makeup separates and turns cakey, dermatologists evaluate four specific pathophysiological points of failure:
1. Micro-Flaking Stratum Corneum (Desiccation)
Even on naturally oily T-zones, urban Indian skin is frequently dehydrated (lacking water). Dry, parched corneocytes act like microscopic sponges: they wick water and humectants directly out of liquid foundations.
As the foundation loses its water content, the suspended pigment particles instantly coagulate and stick to the dry flakes, producing that unmistakable "chalky patch" around the nose, jawline, and forehead.
2. Emulsion Phase Repulsion (Silicone vs. Water)
Skincare and makeup products are formulated as either water-in-oil (W/O), oil-in-water (O/W), or silicone-in-water emulsions.
When patients layer a heavy water-based hydrating primer under a high-silicone foundation (or vice versa), the chemical phases cannot form an interfacial bond. The top layer slips, pills into tiny rubbery balls, and separates as soon as you touch it with a sponge.
3. Humidity Sweat-Trapping Under Occlusives
In tropical Indian climates (Mumbai, Chennai, Kolkata, Delhi monsoons), high ambient humidity prevents facial sweat from evaporating normally.
When heavy dimethicone-heavy foundations are worn outdoors, perspiration accumulates beneath the cosmetic barrier. As sweat pushes outward through follicular ostia, it physically bubbles and lifts the foundation off the skin, causing sudden patchy streaks.
4. The Talc Powder Cement Effect
When shine appears during the day, the standard consumer response is to dust pressed talc powder over the face.
Talc is highly hydrophobic and lipophilic. It absorbs sebum and coagulates into a dense, cement-like paste that sinks directly into open pores and closed comedones, turning fine skin texture into an exaggerated orange-peel pattern.
The Formula Compatibility Matrix: Silicone vs. Water
To stop makeup from pilling and separating, your skincare, sunscreen, primer, and foundation must share matching chemical base architectures. Use this clinical compatibility guide:
| Base Type | Key Top Ingredients (First 5 on Label) | Best For | Pair ONLY With | Avoid Pairing With |
|---|---|---|---|---|
| Silicone-Based | Dimethicone, Cyclopentasiloxane, Isododecane, Polysilicone-11 | Enlarged orange-peel pores, uneven textural pitting, oily T-zone | Silicone primers, silicone-gel sunscreens (e.g. Fixderma Shadow Gel) | Water-based primers with high hyaluronic acid (causes immediate pilling) |
| Water-Based | Aqua/Water, Glycerin, Butylene Glycol, Propanediol | Dry sandpaper texture, micro-flaking, sensitive or acne-inflamed skin | Hydrating water-gel moisturizers, fluid chemical sunscreens | Heavy dimethicone primers (causes foundation to slip and slide off) |
| Oil/Wax-Based | Caprylic/Capric Triglyceride, Jojoba Oil, Cera Alba (Beeswax) | Severe dry eczema-prone skin, mature xerosis | Facial oils, rich ceramide creams | Silicone matte setting sprays, water-based BB creams |
The "Night-Before" Dermatologist Exfoliation Protocol
The most critical rule of skin prep on textured Indian skin is: Never chemically or physically exfoliate the morning of a major event.
Exfoliating in the morning leaves skin in an acutely sensitized state where synthetic cosmetic ingredients cause immediate micro-inflammation and redness. Instead, perform chemical desmolysis 24 to 36 hours prior:
Step 1: The Night-Before Chemical Dissolution
Two nights before your event (or twice weekly), cleanse thoroughly with a low-pH amino-acid cleanser. On bone-dry skin, apply Mandelic Acid 10% (for sensitive or PIH-prone skin) or Lactic Acid 10%. This gently dissolves the corneodesmosome bonds holding rough flakes together while you sleep.
Step 2: The Nocturnal Ceramide Lock
Wait 10 minutes after acid application, then apply a generous layer of a physiological lipid barrier cream containing Ceramides, Cholesterol, and Squalane. This ensures newly exposed stratum corneum cells are completely saturated with lipids, preventing rebound flaking.
Step 3: The Morning-Of Status
When you wake up on the day of makeup wear, dead cell clusters have already shed naturally into your pillow. Skin is soft, calm, and hydrated—ready to receive cosmetic primer without stinging or irritation.
The 5-Step Morning "Glass Canvas" Protocol
Follow this structured step-by-step skincare routine on the morning of wearing foundation or concealer:
1. Non-Stripping Lukewarm Cleanse (pH 5.0–5.5)
Wash with a mild, soap-free gel cleanser (e.g. Minimalist Aquaporin or Cetaphil Gentle). Do NOT use hot water, which strips natural lipids, and avoid foaming SLS face washes.
2. Damp-Skin Humectant Flooding (The Plumper)
Do not dry your face completely. Onto damp skin, apply 3–4 drops of a pure Hyaluronic Acid + Glycerin (5%+) serum. Humectants swell epidermal cells with moisture, plumping periporoid skin and smoothing out shallow texture depressions instantly.
3. Lightweight Oil-Free Gel-Cream (The Barrier Shield)
Apply a sheer layer of a ceramide-infused, oil-free water gel (e.g. Sebamed Clear Face Gel or Dot & Key Ceramide Moisturizer). This creates a flexible lipid seal without leaving a heavy grease film that breaks down foundation.
4. Broad-Spectrum Matte Sunscreen (SPF 50+ / PA++++)
Apply a fluid or silicone-gel sunscreen. A lightweight silicone sunscreen doubles as an exceptional pore-blurring makeup primer, eliminating the need for an extra heavy primer layer.
5. The 5-Minute Cohesion Wait (Crucial)
Do NOT touch your face for 5 to 7 minutes. Skincare requires time to form a cohesive, dry-touch polymer film on the stratum corneum. Applying foundation too quickly causes skincare and makeup emulsions to mix and curdle.
Application Biomechanics: Stippling vs. Swiping
How you physically apply cosmetic products onto textured skin matters as much as the formula itself:
The Swiping Flaw (Why Brushes Fail)
When you drag, swipe, or buff a flat or kabuki foundation brush across textured skin, the stiff bristles act like miniature scrapers. They catch against the microscopic edges of dead corneocytes, lifting them upright. Within minutes, dry flakes that were previously invisible stand out like rough fish scales.
The Damp Stippling Technique (Dermatologist Preferred)
Saturate a microfiber makeup sponge with water and squeeze out all excess until it is just damp. Using a gentle bouncing and stippling motion, press foundation into the skin. This pushes dead scales flat against the epidermis, delivers microscopic hydration, and deposits a sheer, uniform pigment film without disturbing the barrier.
Setting Powder & Spray Rules for Indian Climate
To prevent foundation from sliding in humid Indian weather without turning chalky or emphasizing texture:
Switch to Micro-Milled Silica (Talc-Free)
Avoid heavy talc-based powders. Choose translucent powders formulated with pure spherical Silica. Spherical silica particles bounce light across microscopic texture depressions, creating an optical soft-focus blur rather than a heavy, cakey mask.
The "Targeted Powder" Rule
Never powder your entire face. Apply powder ONLY to areas of active sebum production: the sides of the nose, central forehead, and chin crease. Leave the outer cheeks, jawline, and temples unpowdered to preserve natural epidermal radiance.
The Alcohol-Free Hydrating Mist Melt
After applying powder, mist your face generously with an alcohol-free setting spray containing glycerin or green tea extract. This dissolves powdery surface residue and "melds" the makeup layers together into a seamless second-skin finish.
Midday Touch-Up: Fixing Separation Without Cakey Buildup
When you look in the mirror at 3 PM and notice foundation separating around your nose or pooling into cheek pores, follow the dermatologist 3-step rescue protocol:
Step 1: Blotting Paper Press
Take an unpowdered linen or volcanic blotting paper and gently press (never rub) over separated areas. This removes surface oxidized sebum without stripping the underlying pigment.
Step 2: Hydrating Mist Re-Emulsification
Spray a fine mist of thermal or hydrating water across the face. The water re-activates the emulsifiers in your existing foundation, softening dried pigment edges.
Step 3: Clean Finger Tap (Body Heat Melting)
Using the clean pad of your ring finger, gently tap over the separated patches. The natural warmth of your fingertip re-melts the foundation polymers, smoothing them back into an even plane without adding another layer of cakey makeup.
The 4-Week Skin Smoothing Regimen (Making Makeup Optional)
While cosmetic skin prep manages daily appearance, true glass-smooth skin requires normalizing the underlying biology of cellular turnover. Implement this 4-week clinical protocol:
| Night | Target Clinical Objective | Active Ingredients & Protocol |
|---|---|---|
| Night 1: Chemical Desmolysis | Dissolve dead corneocyte plugs & clear pores | Double cleanse → Salicylic Acid 2% on T-zone + Lactic Acid 10% on cheeks → Wait 10 min → Ceramide moisturizer |
| Night 2: Cellular Remodeling | Accelerate turnover & stimulate collagen | Cleanse → Sandwich method: Moisturizer → Pea-sized Adapalene 0.1% or Retinal 0.05% → Moisturizer |
| Night 3: Pigment & Pore Refinement | Pacify melanocytes & regulate sebum output | Cleanse → Azelaic Acid 10% + Niacinamide 5% serum → Lightweight ceramide cream |
| Night 4: Pure Barrier Recovery | Replenish physiological lipids & rebuild acid mantle | Gentle cleanse → Damp-skin Hyaluronic Acid → Rich 3:1:1 Ceramide barrier cream + Squalane oil |
Frequently Asked Questions: Cakey Makeup & Texture
Cakey makeup and foundation separation are driven by emulsion breakdown on compromised skin. When you have rough skin texture (micro-flaking and dead cell buildup), dry corneocytes rapidly suck the water and volatile carriers out of liquid foundation, leaving behind concentrated, chalky pigment clumps. Simultaneously, sebaceous glands under the surface secrete oil that breaks down the foundation's emulsifiers, causing the makeup to separate into patchy, cakey islands within 2 to 3 hours.
Using physical walnut, apricot, or beaded scrubs on the morning of makeup application creates microscopic epidermal lacerations and triggers acute erythema. When you apply foundation or concealer over freshly abraded skin, cosmetic chemical dyes, preservatives, and fragrances penetrate deep into the micro-wounds, causing immediate burning and subclinical inflammation. In South Asian skin (Fitzpatrick IV–VI), this mechanical trauma reliably stimulates melanocytes, leaving behind persistent post-inflammatory dark marks.
Look at the first 3 to 5 ingredients on both product packaging. If your primer contains water and glycerin as top ingredients (water-based) while your foundation lists dimethicone, cyclopentasiloxane, or isododecane (silicone-based), they will repel each other like oil and water. This chemical clash causes the foundation to slip, pill into tiny balls, and separate over your pores. Always pair water-based primers with water-based foundations, and silicone primers with silicone foundations.
Dermatologists recommend applying a gentle, large-molecule chemical exfoliant like Mandelic Acid (10%) or Lactic Acid (5%–10%) 36 to 48 hours BEFORE the event (two nights prior). This gives the stratum corneum adequate time to dissolve dead cell bonds and shed microscopic flaking without acute redness. Follow with a ceramide barrier cream overnight. Never perform aggressive chemical peels or new active treatments within 48 hours of wearing heavy event makeup.
Makeup emphasizes pores due to the optical physics of micro-shadowing. Liquid foundations naturally settle into the low valleys of dilated follicular ostia while sitting thinner on the surrounding elevated skin ridges. Under daylight or directional indoor lighting, this contrast casts sharp micro-shadows that visually double the apparent diameter of pores. To avoid this, hydrate the skin with humectants to plump the periporoid skin outward, and use a dimethicone-based blurring primer to fill the microscopic depressions.
Dragging or buffing foundation with stiff brush bristles creates directional surface shear that catches against the raised, curled edges of microscopic dead keratinocytes, lifting them upright like scales and making texture appear dramatically worse. In contrast, pressing and stippling with a damp microfiber beauty blender pushes cosmetic pigments flat against the skin surface and transfers excess moisture, creating a smooth, non-cakey finish.
Do NOT apply compact powder directly over separated, oily foundation. Powder mixes with surface sebum to create a thick, cakey paste that sinks into pores. Instead, follow the 3-step dermatologist touch-up: (1) Press an unpowdered blotting paper across oily zones to lift excess sebum; (2) Mist face with an alcohol-free hydrating spray to re-emulsify the foundation pigments; (3) Gently pat with a clean finger or sponge to blend the makeup back together.
A 4-week clinical skin cycling framework incorporating: (1) Lactic Acid 10% or Salicylic Acid 2% two evenings a week to dissolve corneocyte retention; (2) Adapalene 0.1% or Retinol two evenings a week to normalize follicular cell turnover and stimulate dermal collagen; (3) Pure Ceramide & Hyaluronic Acid barrier recovery on remaining nights; and (4) Daily broad-spectrum SPF 50+ PA++++ protection. This transforms the underlying skin architecture within 28 days.